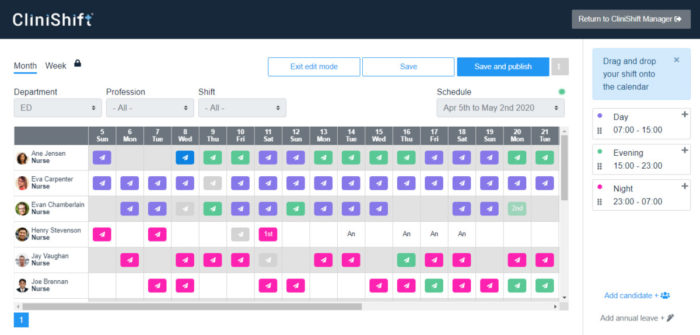
Using this function you can edit published and unpublished schedules. On both cases the staff will only be notified once you ‘Save and Publish’, otherwise you can also “Save” and publish later, or “Exit edit mode” in this case the changes made will not be saved for later or published. The functions available to edit your schedule are outlined in the menu on the right side of the screen, where you can see the shift types, the option for “Annual leave” which you can select the type with the arrows, and the option to “Add a candidate”.

In case you need to re-start editing from the beginning, you can reset by selecting the “…” option and the “Reset” will appear. By selecting this option all the changes made will be cleared.
How to allocate or remove a shift?
To allocate a shift to a staff member, you just need to drag the corresponding shift on the menu and drop to the date and candidate. The same procedure is followed to add “Annual leave”, for this option you can pre-select the reason with the arrows. In case you want to remove a shift already placed in the calendar you drag the shift from the schedule towards the menu, and a “Trash” symbol will appear, by dropping the shift in the trash the shift will be removed from the schedule. Please note, staff will only be notified of any changes once the Schedule is published, by selecting the option to “Save and publish”.
How to add a new staff member?
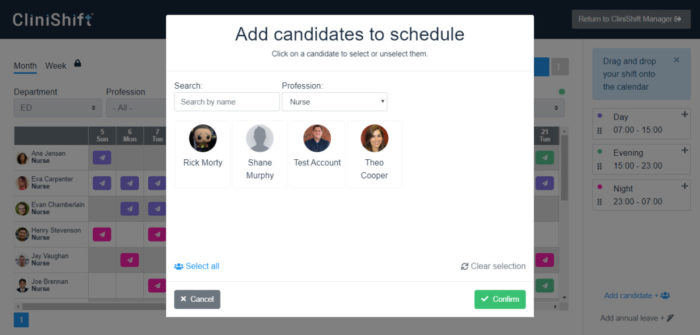
You can add a new staff member by selecting the “Add candidate +” option on the menu, on the right side of the screen. A new window will open and you will see the staff members, you can find the candidate by typing the name on the ‘Search’ option, and can also sort by “Profession”.

To select a candidate click in the corresponding staff members picture, you can select multiple members by manually selecting each of them, and if you wish to select all, there is an option in the bottom left “select all” that will select all candidates from the list, including the ones that are further down on the list, that you can see by scrolling down the candidates poll. Once you have the staff member(s) you would like to add to your schedule, select the “Confirm” option and the respective name(s) will appear at the end of the list on your schedule and you can allocate shifts.
Removing a staff member
To remove a staff member from the list you will need to manually delete all the shifts allocated for that staff member, once that is done a red “X” will appear beside their name and by selecting this option that candidate will be removed from that schedule. To include that staff member again you can do it, by using the “Add candidate +” button.
